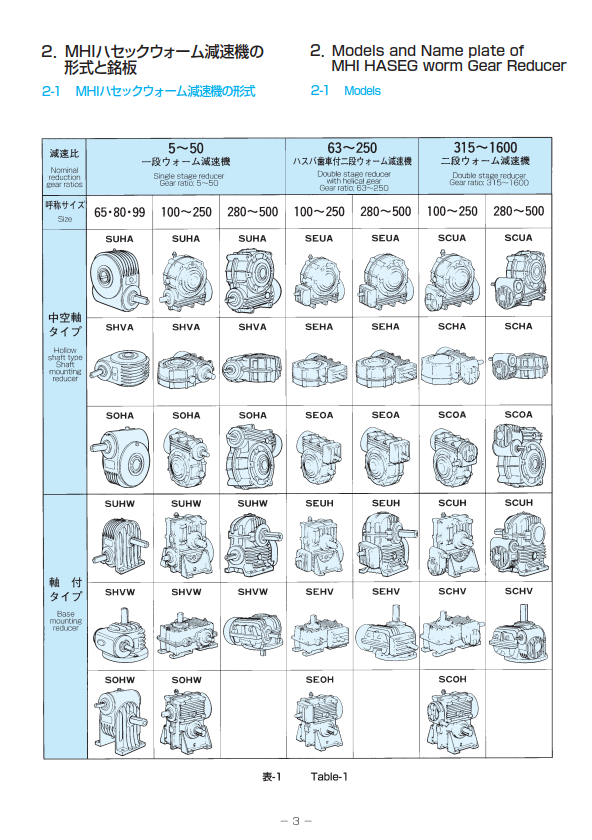
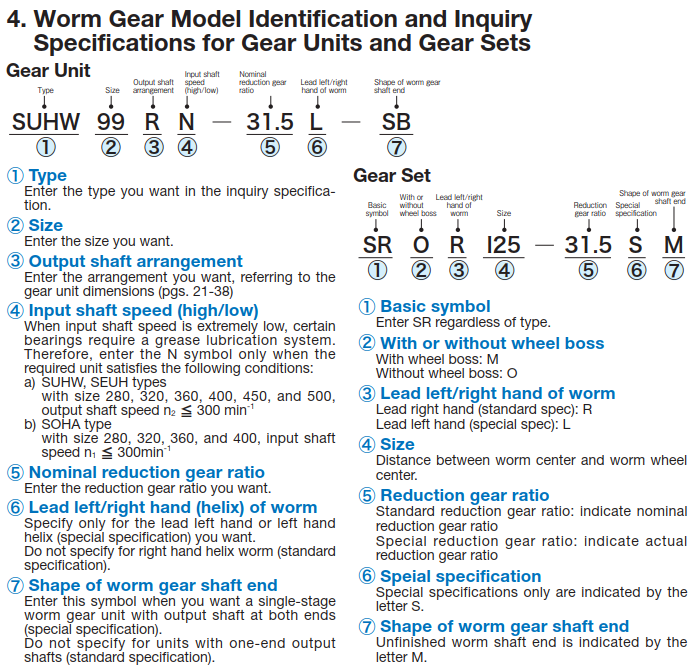
Disassembly Instructions for MHI HASEG Worm Gear Reducer SOHW65L-5
Disassembling the MHI HASEG Worm Gear Reducer SOHW65L-5 involves several precise steps to ensure that all components are handled correctly and to avoid damage. Here’s a comprehensive guide for disassembling the SOHW65L-5.
Preparation
-
Safety First
- Power Off: Ensure the power to the equipment is completely turned off and locked out to prevent accidental start-up.
- PPE: Wear appropriate personal protective equipment (PPE) including gloves and safety glasses.
-
Prepare Workspace
- Clean Area: Ensure the workspace is clean to avoid contamination of internal components.
- Tools: Gather all necessary tools, such as wrenches, screwdrivers, and a hoist or lifting equipment if needed.
-
Documentation
- Record Assembly: Take pictures and make notes of the current assembly for reference during reassembly.
Disassembly Steps
-
Remove External Components
- Mounting Hardware: Remove all external mounting bolts or brackets securing the SOHW65L-5 to its base or connecting equipment.
- Shaft Attachments: Disconnect any components or couplings attached to the input and output shafts of the SOHW65L-5.
-
Drain Lubrication
- Drain Oil: Position a container under the gear reducer and remove the oil drain plug to let the synthetic oil drain completely.
- Inspect Oil: Check the drained oil for contaminants or metal particles that might indicate internal issues.
-
Remove External Covers and Guards
- Covers/Guards: Unscrew and remove any external covers, guards, or shields from the SOHW65L-5 to access internal components.
-
Disassemble Gear Reducer
- End Covers: Remove the bolts holding the end covers to the SOHW65L-5 housing. Carefully lift off the end covers.
- Gear Set: Remove the worm gear set or other internal gears, noting their orientation and position. Use appropriate tools to remove any retaining rings or fasteners.
- Bearings: If necessary, carefully remove bearings with a bearing puller or similar tool.
-
Remove Internal Components
- Worm Gear: Extract the worm gear from the housing of the SOHW65L-5, ensuring not to damage any surrounding parts.
- Output Shaft: Carefully remove the output shaft from the gear reducer.
- Other Parts: Remove additional internal parts as needed, following the same precautions to avoid damage.
-
Inspect Components
- Visual Check: Examine all disassembled components of the SOHW65L-5 for wear, damage, or contamination.
- Cleaning: Clean all parts with suitable cleaning solutions and ensure they are free of debris.
Post-Disassembly
-
Storage
- Organize Parts: Keep all parts from the SOHW65L-5 organized and labeled to assist with reassembly.
- Protect Components: Store the components in a clean, dry area to avoid damage.
-
Consult Manufacturer’s Manual
- Reassembly: Refer to the MHI HASEG manual for specific reassembly instructions, including torque specifications and procedures for the SOHW65L-5.
-
Repair or Replacement
- Assess Needs: Based on inspection results, determine if any components need repair or replacement.
Additional Tips
- Detailed Notes: Document the disassembly process of the SOHW65L-5, including any issues encountered.
- Professional Help: For complex disassembly tasks or if specialized tools are required, consider consulting a professional or contacting MHI HASEG.
By following these detailed disassembly instructions, you can effectively handle the MHI HASEG Worm Gear Reducer SOHW65L-5, ensuring that all components are managed properly for maintenance or repair.


